Final Project: Hanging Particles with Connecting Lines (Network System)
Goal / Idea
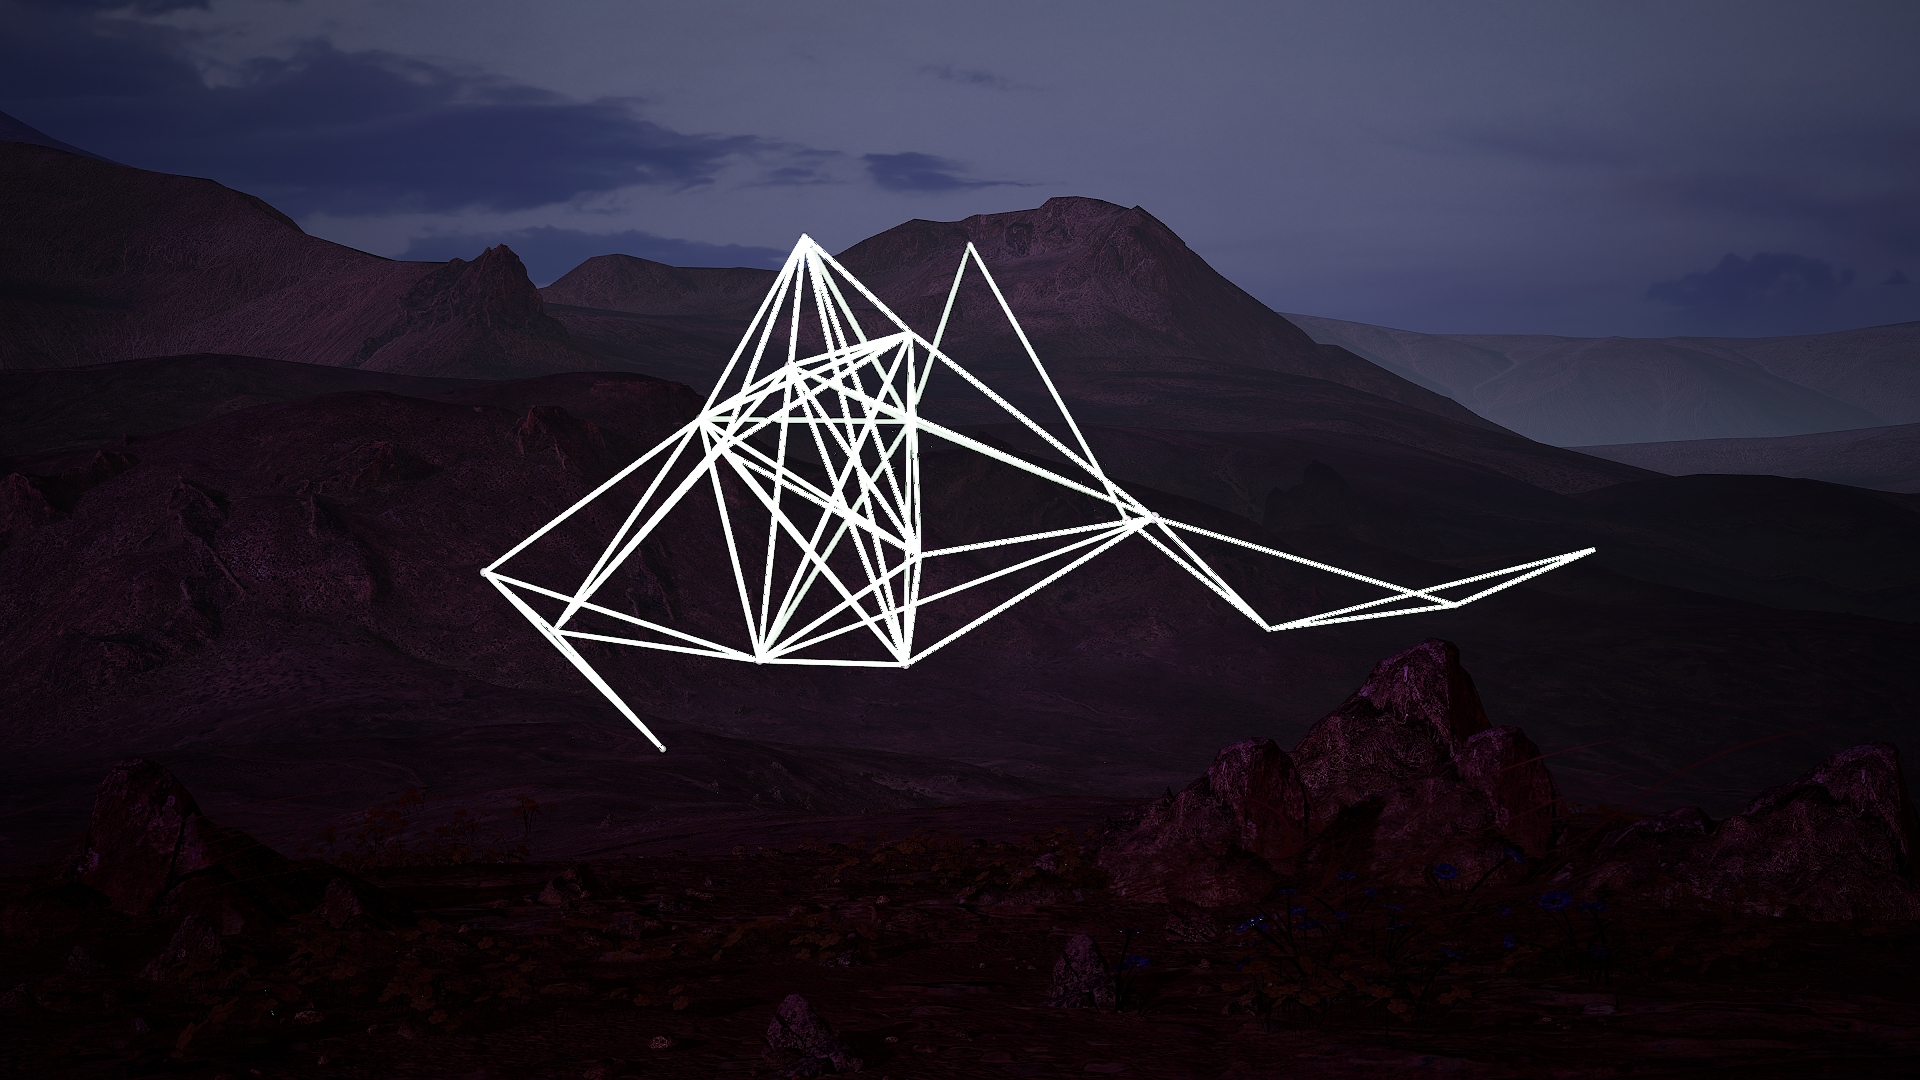
The idea of this project was to create a cool-looking particle simulation. I wanted to have many particles floating in space, and each particle should connect to nearby ones with lines. This should create a kind of net or web structure. It was inspired by some generative art and abstract visuals. As I discovered that there are no similar tutorials or projects to be found on the net (at least I did not found any). The most similar one would be connecting particles usually usign a Ribbon Renderer, however this one just connects the particles with on continuos line, and not like I did various lines connecting nearby particles.
Approach
To make this happen, I used:
- Niagara System to create the moving particles
- Blueprints to read particle data and draw lines between them
- Spline Meshes to create real 3D lines
- A custom pooling system to make the project run faster
Blueprint Overview
BP_DotManager
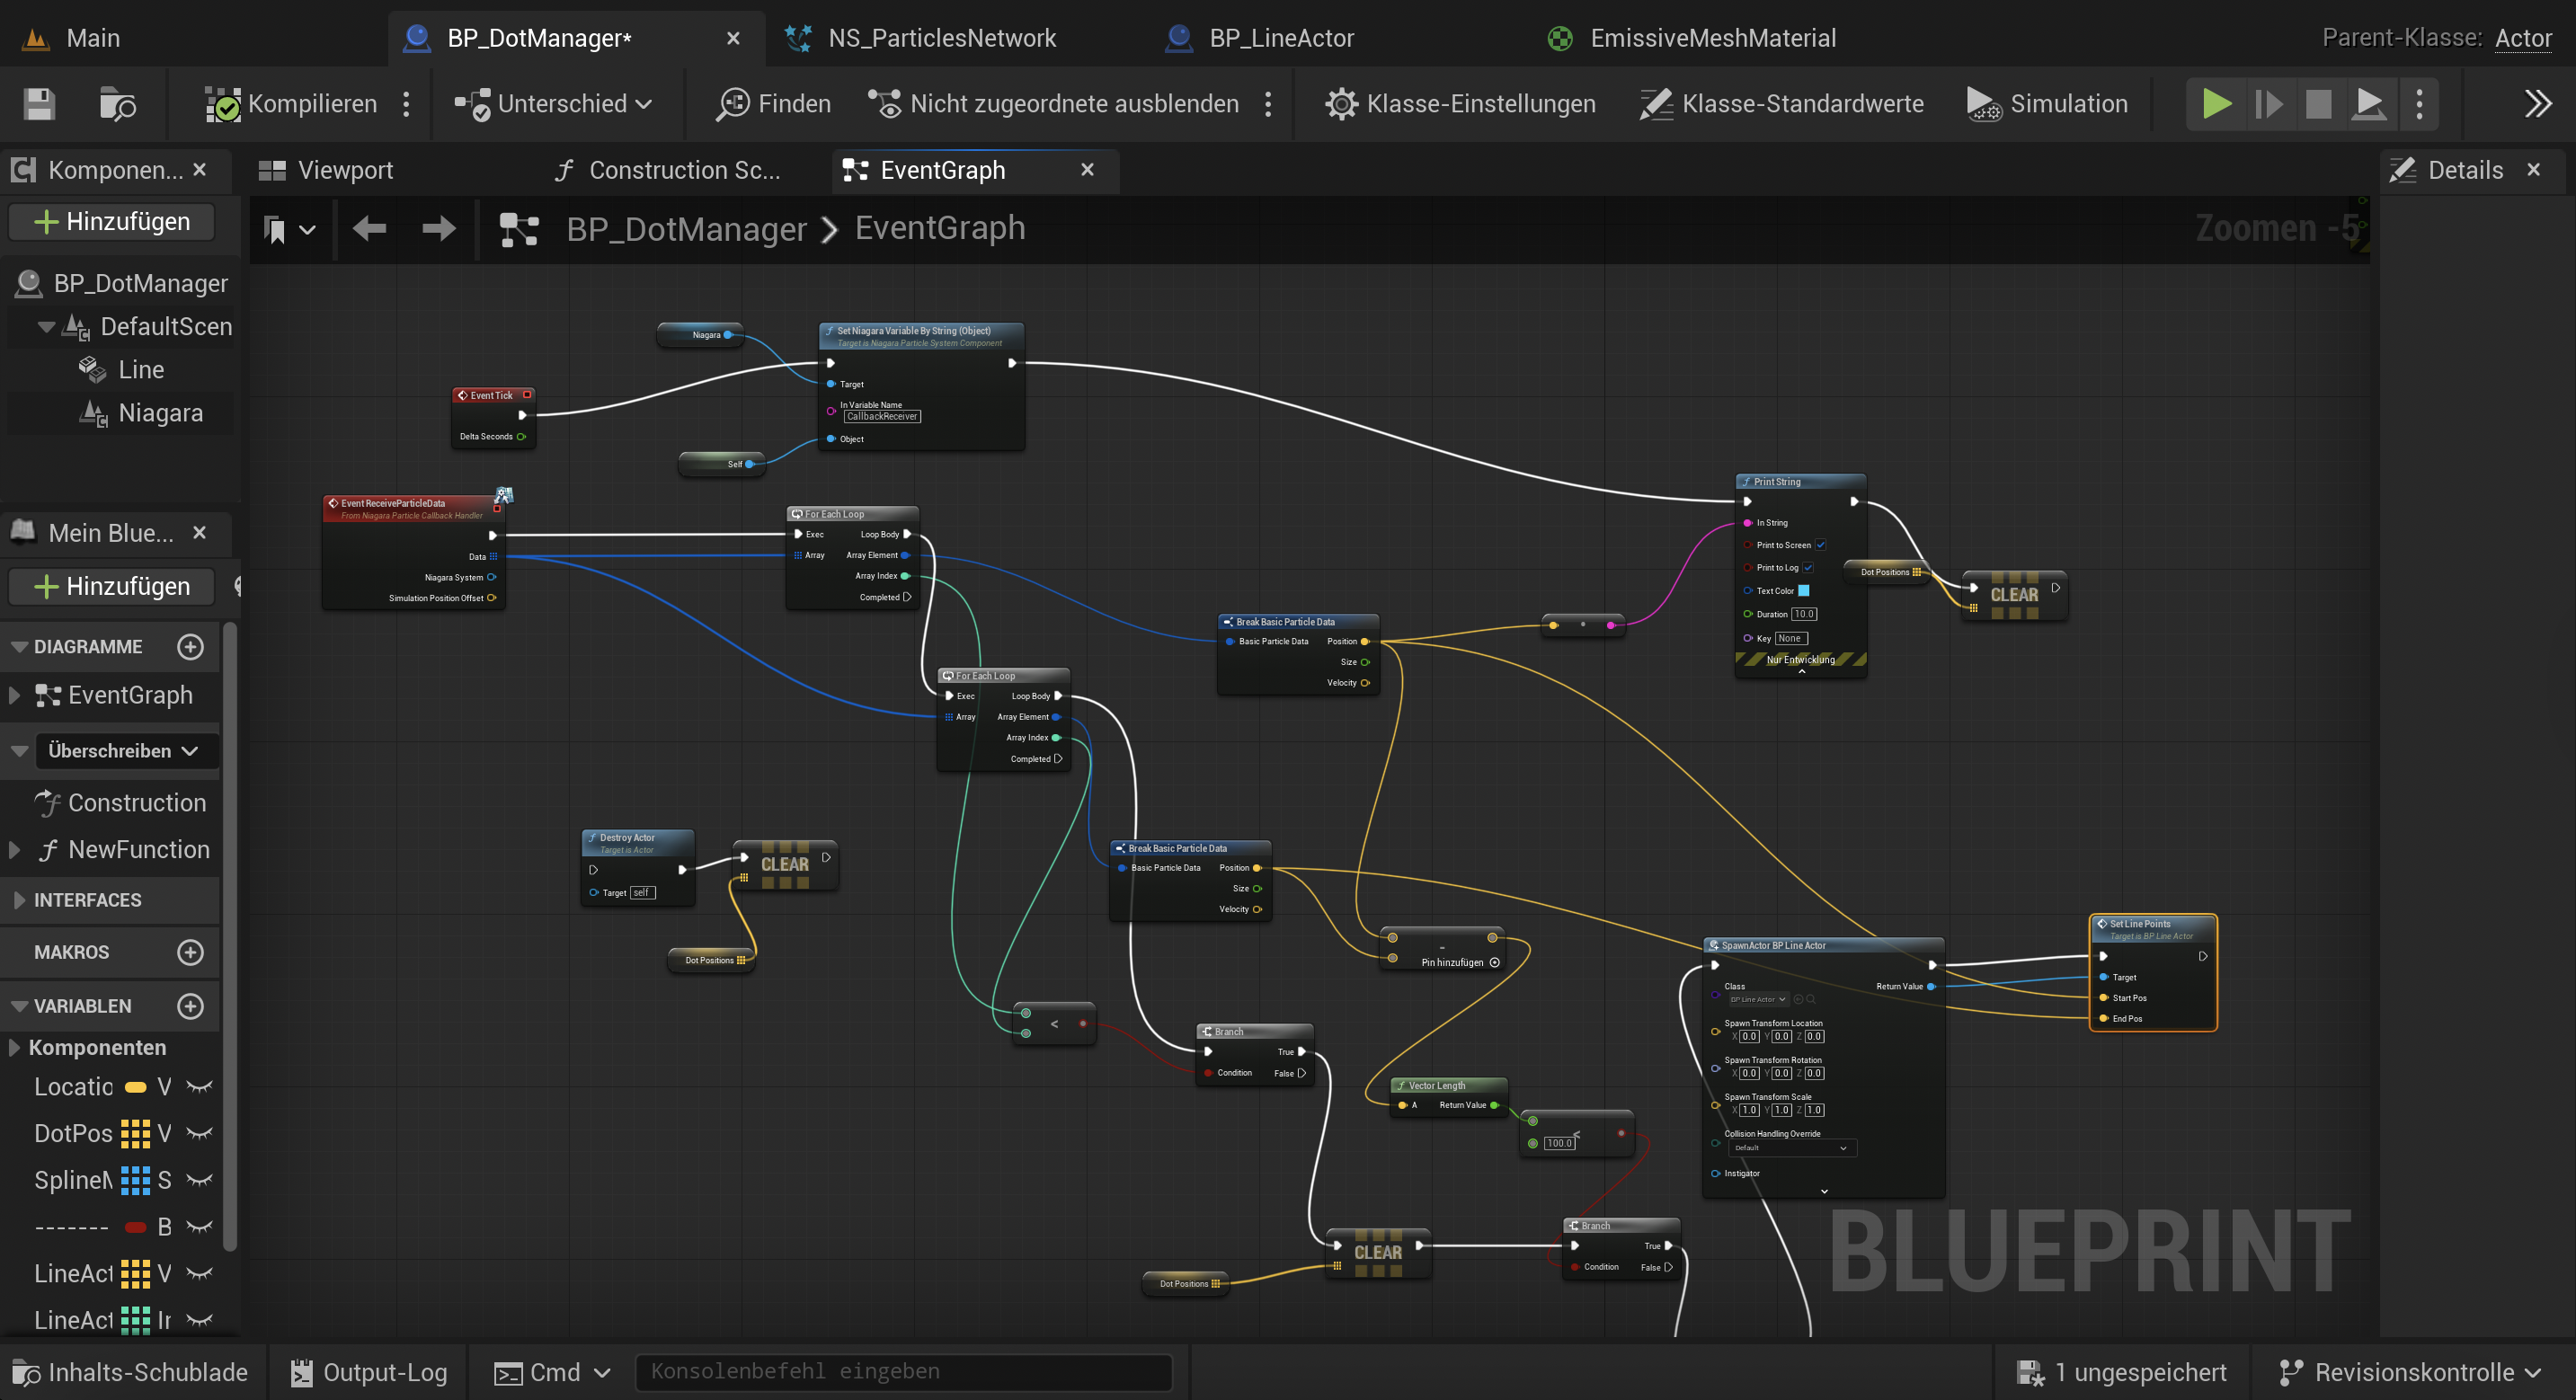
This is the main controller Blueprint.
It handles the logic for:
- Receiving the particle data
- Looping (ForLoop) through all the particles
- Checking which ones are close enough
- Spawning or updating line actors between nearby particles
- Also manages a pool of
BP_LineActorobjects to avoid spawning too many actors every frame
Pseudo Code: For Loop Logic
// Loop over all particles (outer loop)
For Each particle A in received particle array:

    // Loop over all particles again (inner loop)
    For Each particle B in received particle array:

    // Check if A and B are not the same particle
        If A != B:

    // Measure the distance between A and B
        distance = VectorLength(A.Position - B.Position)

    // Only draw a line if they are close enough
        If distance < MaxDistance:

    // Get a line actor from the pool or create a new one
        line = GetOrSpawnLineActor()

    // Send positions to the line actor to draw the line
        line.SetLinePoints(A.Position, B.Position)
BP_LineActor
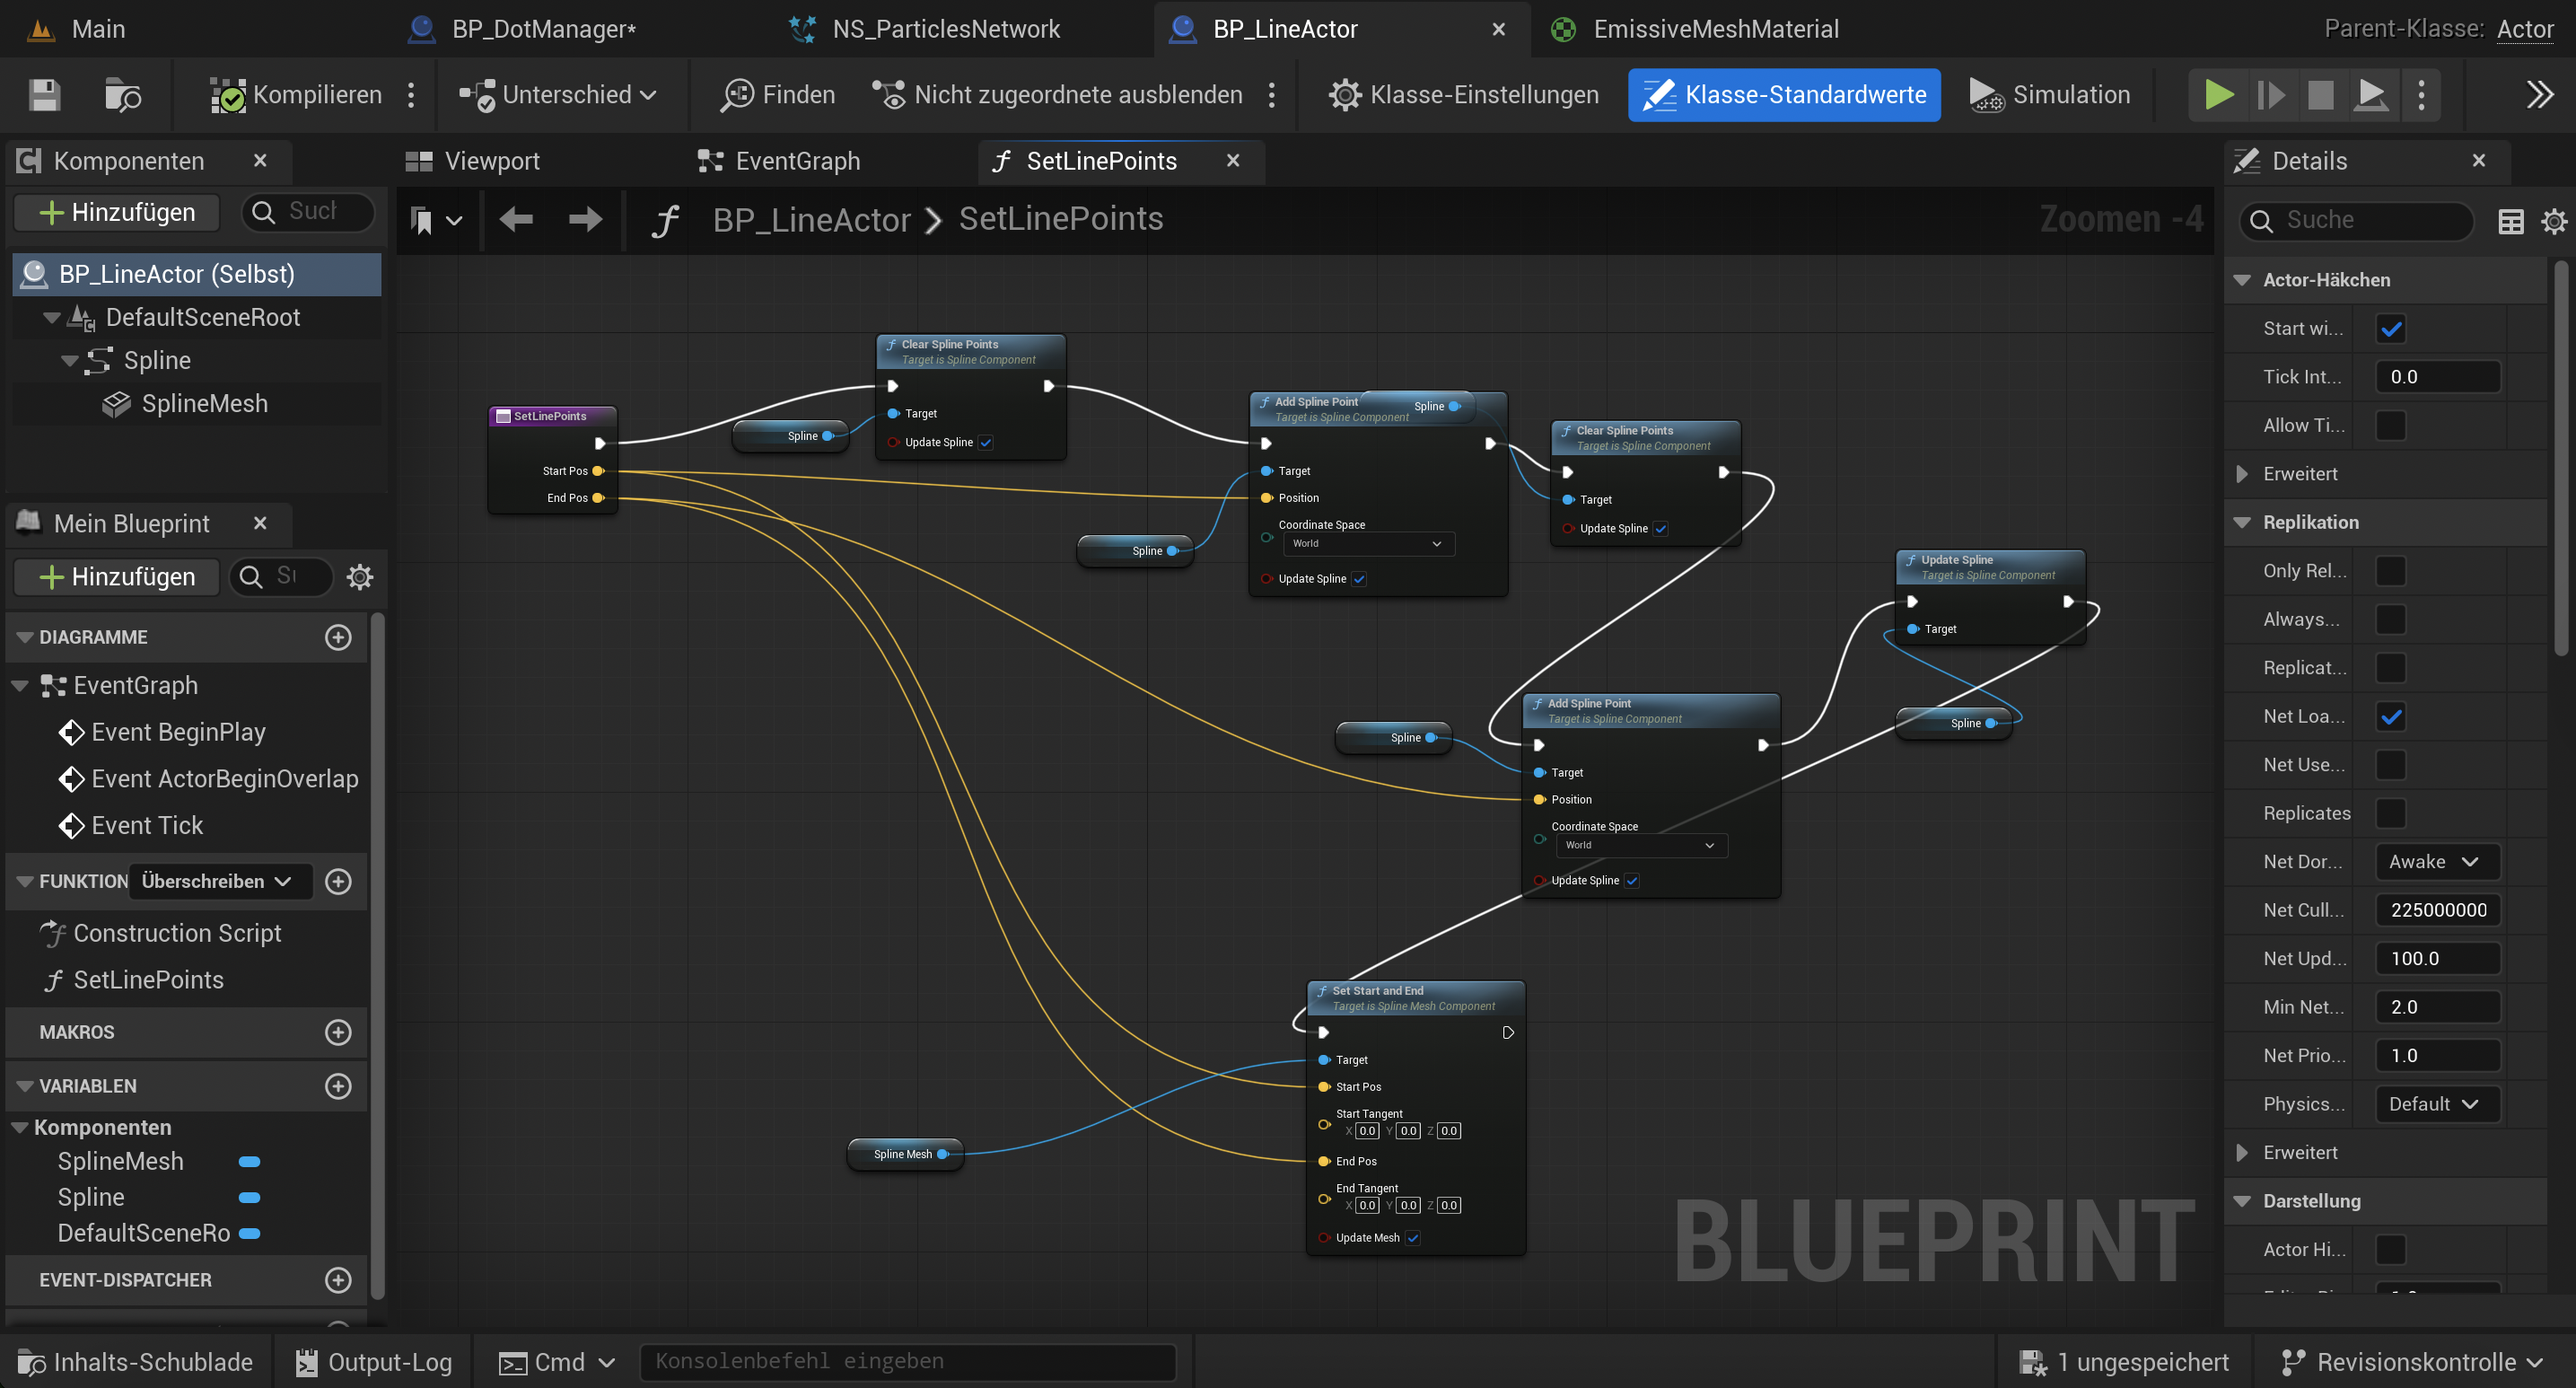
This Blueprint creates a simple spline with a mesh stretched between two points.
It is used to draw the line between two particles.
Each line is reused from a pool instead of being created every frame. This helps reduce lag and crashes.
The main function in here is SetLinePoints, which:
- Clears the spline
- Adds two points (start and end)
- Updates the spline
- Sets the mesh to stretch between the two points
NS_HangingParticulates
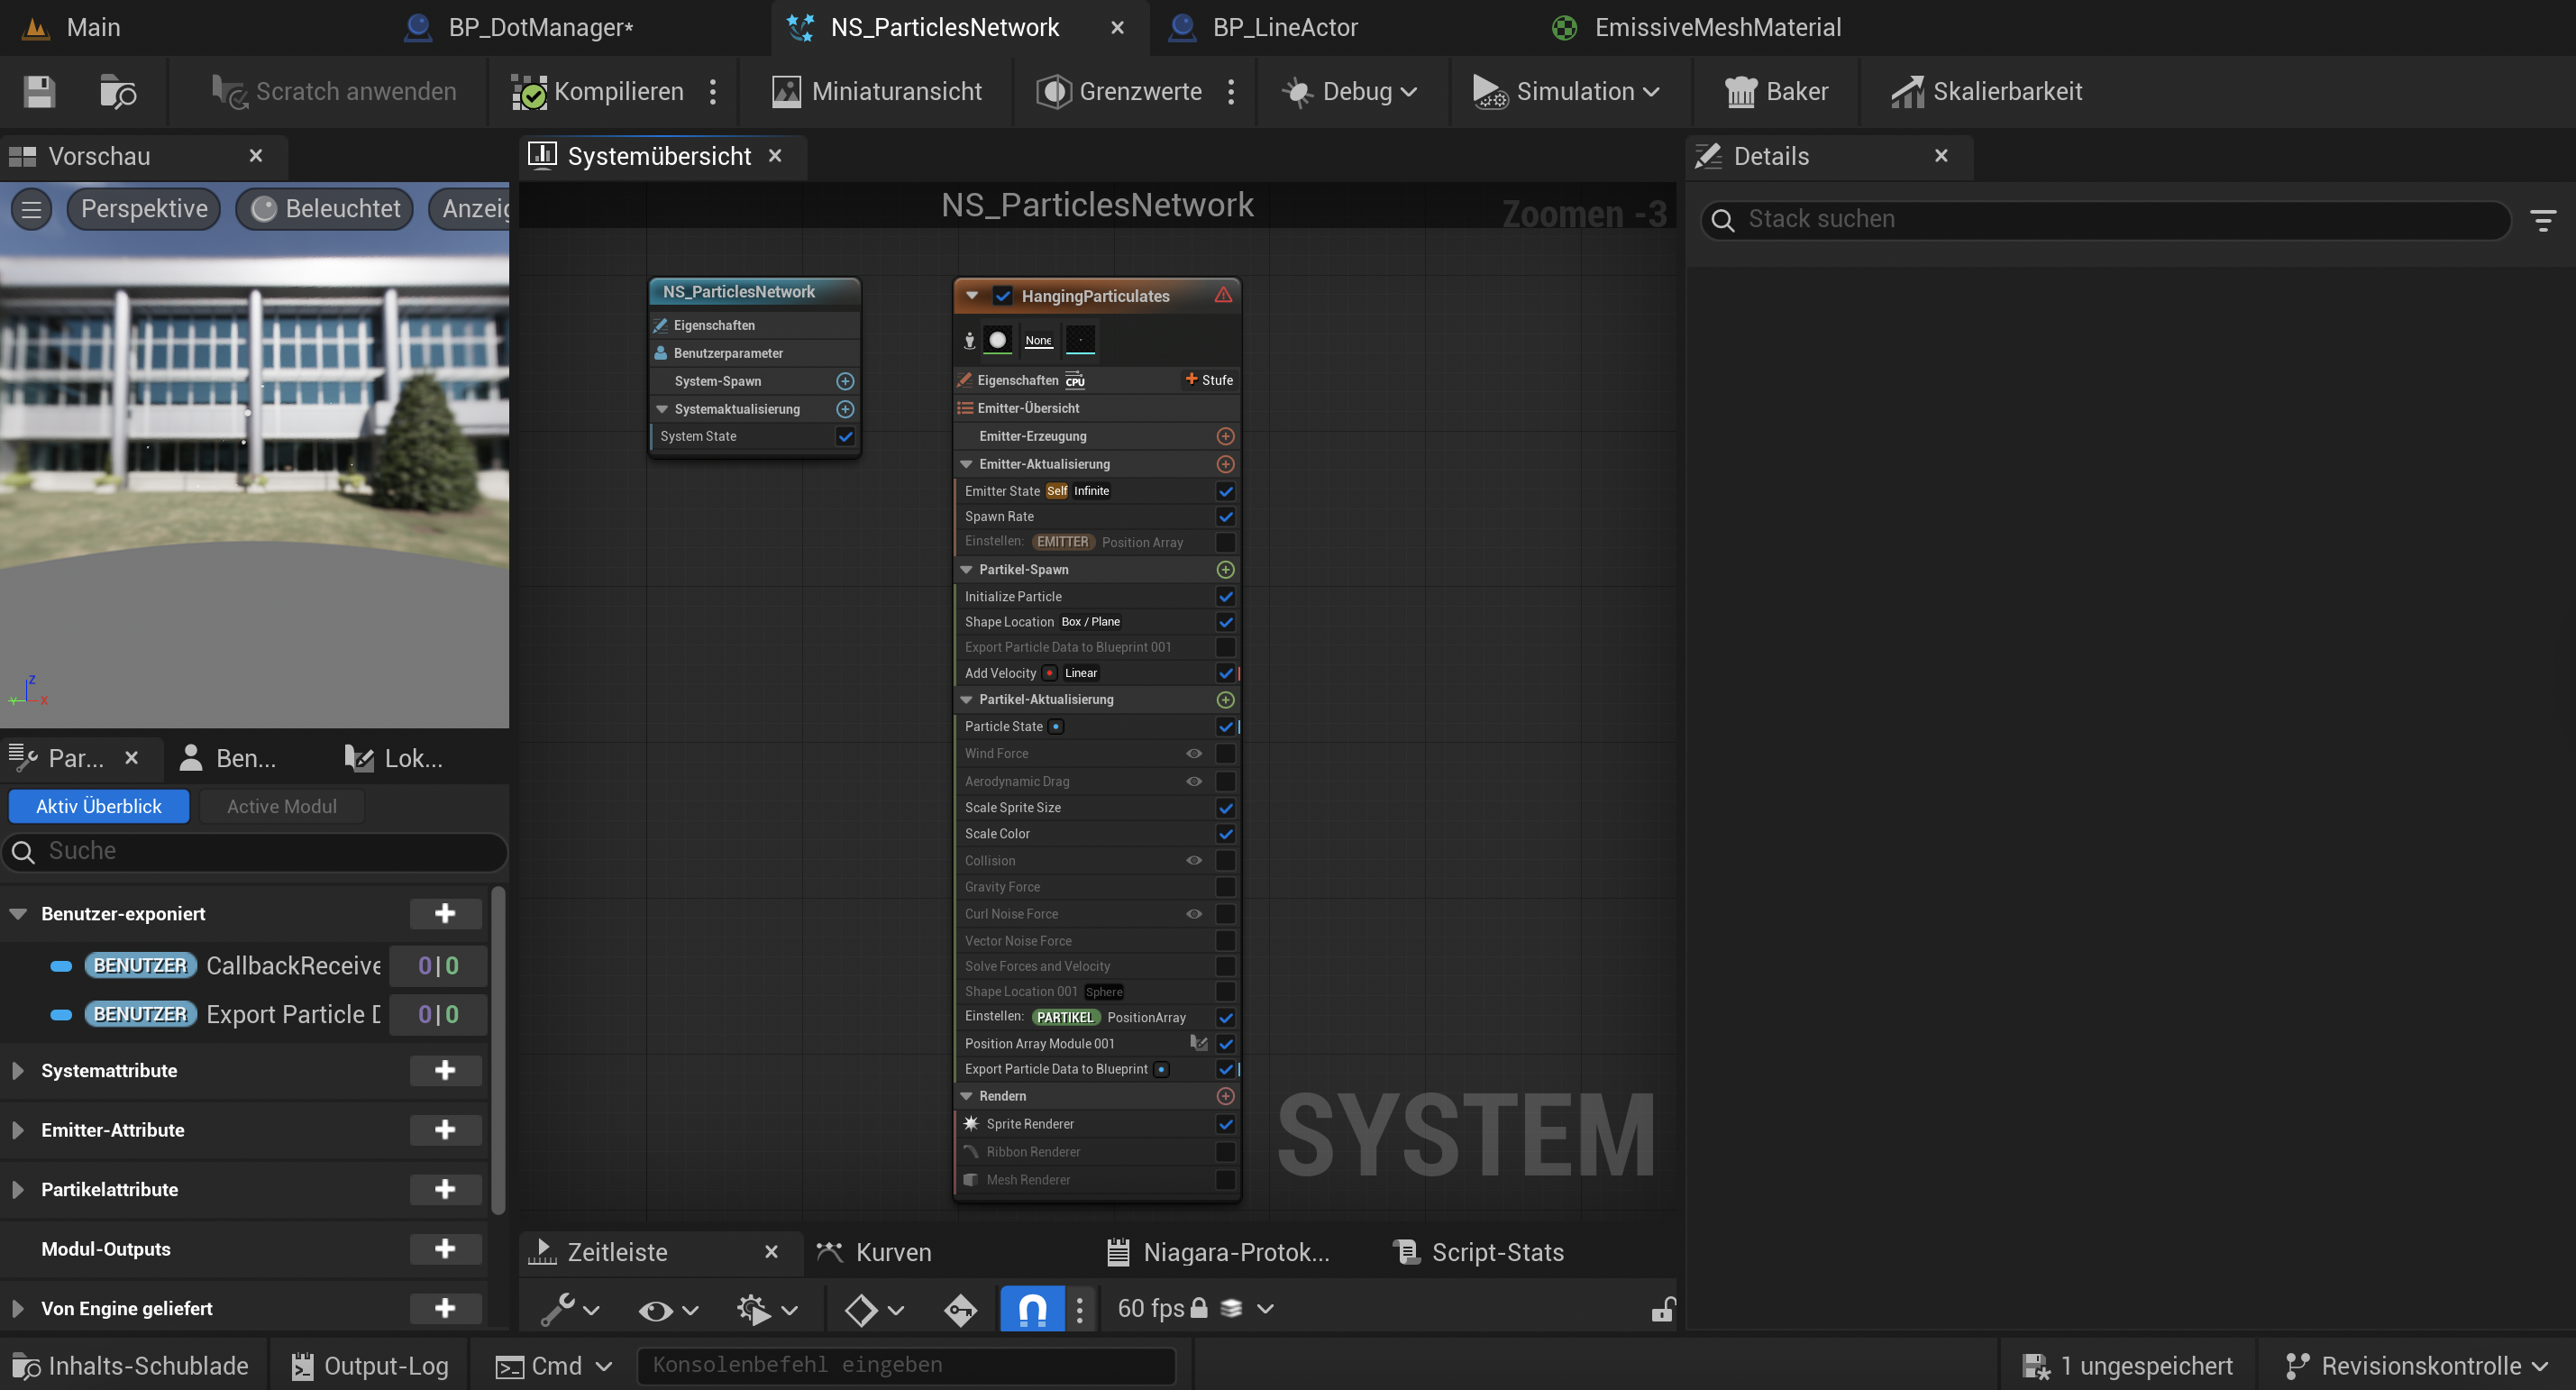
This is the Niagara System that spawns and manages the particles adapted from the template “Niagara Particulates”
- It uses a particle emitter, spawns a defined amout of particles and kills them after some time.
- It sends the position of the particles to the Blueprint using a Export Particle Data to Blueprint module.
This way, the Blueprint always knows where the particles are.
Summary
In short:
- Particles are spawned in Niagara
- Their positions are sent to Blueprints
- The Blueprint checks which ones are close
- Lines are drawn using spline mesh components
- A pooling system is used to avoid performance issues
Challenges
- A lot a lot… I spent a bit longer than a week only figuring the Blueprints. As there were no tutorials, I had to learn it by heart how blueprint communicate and work and what their logic is. However, I wanted to learn it anyways.
- Learning how to read Niagara particle data in Blueprint took some time
- Drawing the lines correctly between all nearby particles without creating a mess
- Implementing “code” logic into a node system.
Learnings
- How to use variables to send and store data in Blueprints and Niagara Systems.
- How to create spline meshes between two points. (Draw a line between A and B).
- Why performance is important when working with many particles
- How to debug and organize large Blueprint logic. (Using debug nodes in BP like printing the coordinates of the particles on the screen)
Final Result
The video shows the final result:
- Hanging particles floating in space
- Lines drawn between nearby particles
You can view the final result here.
Also, watch the preview showed below here.
Preview low-res: 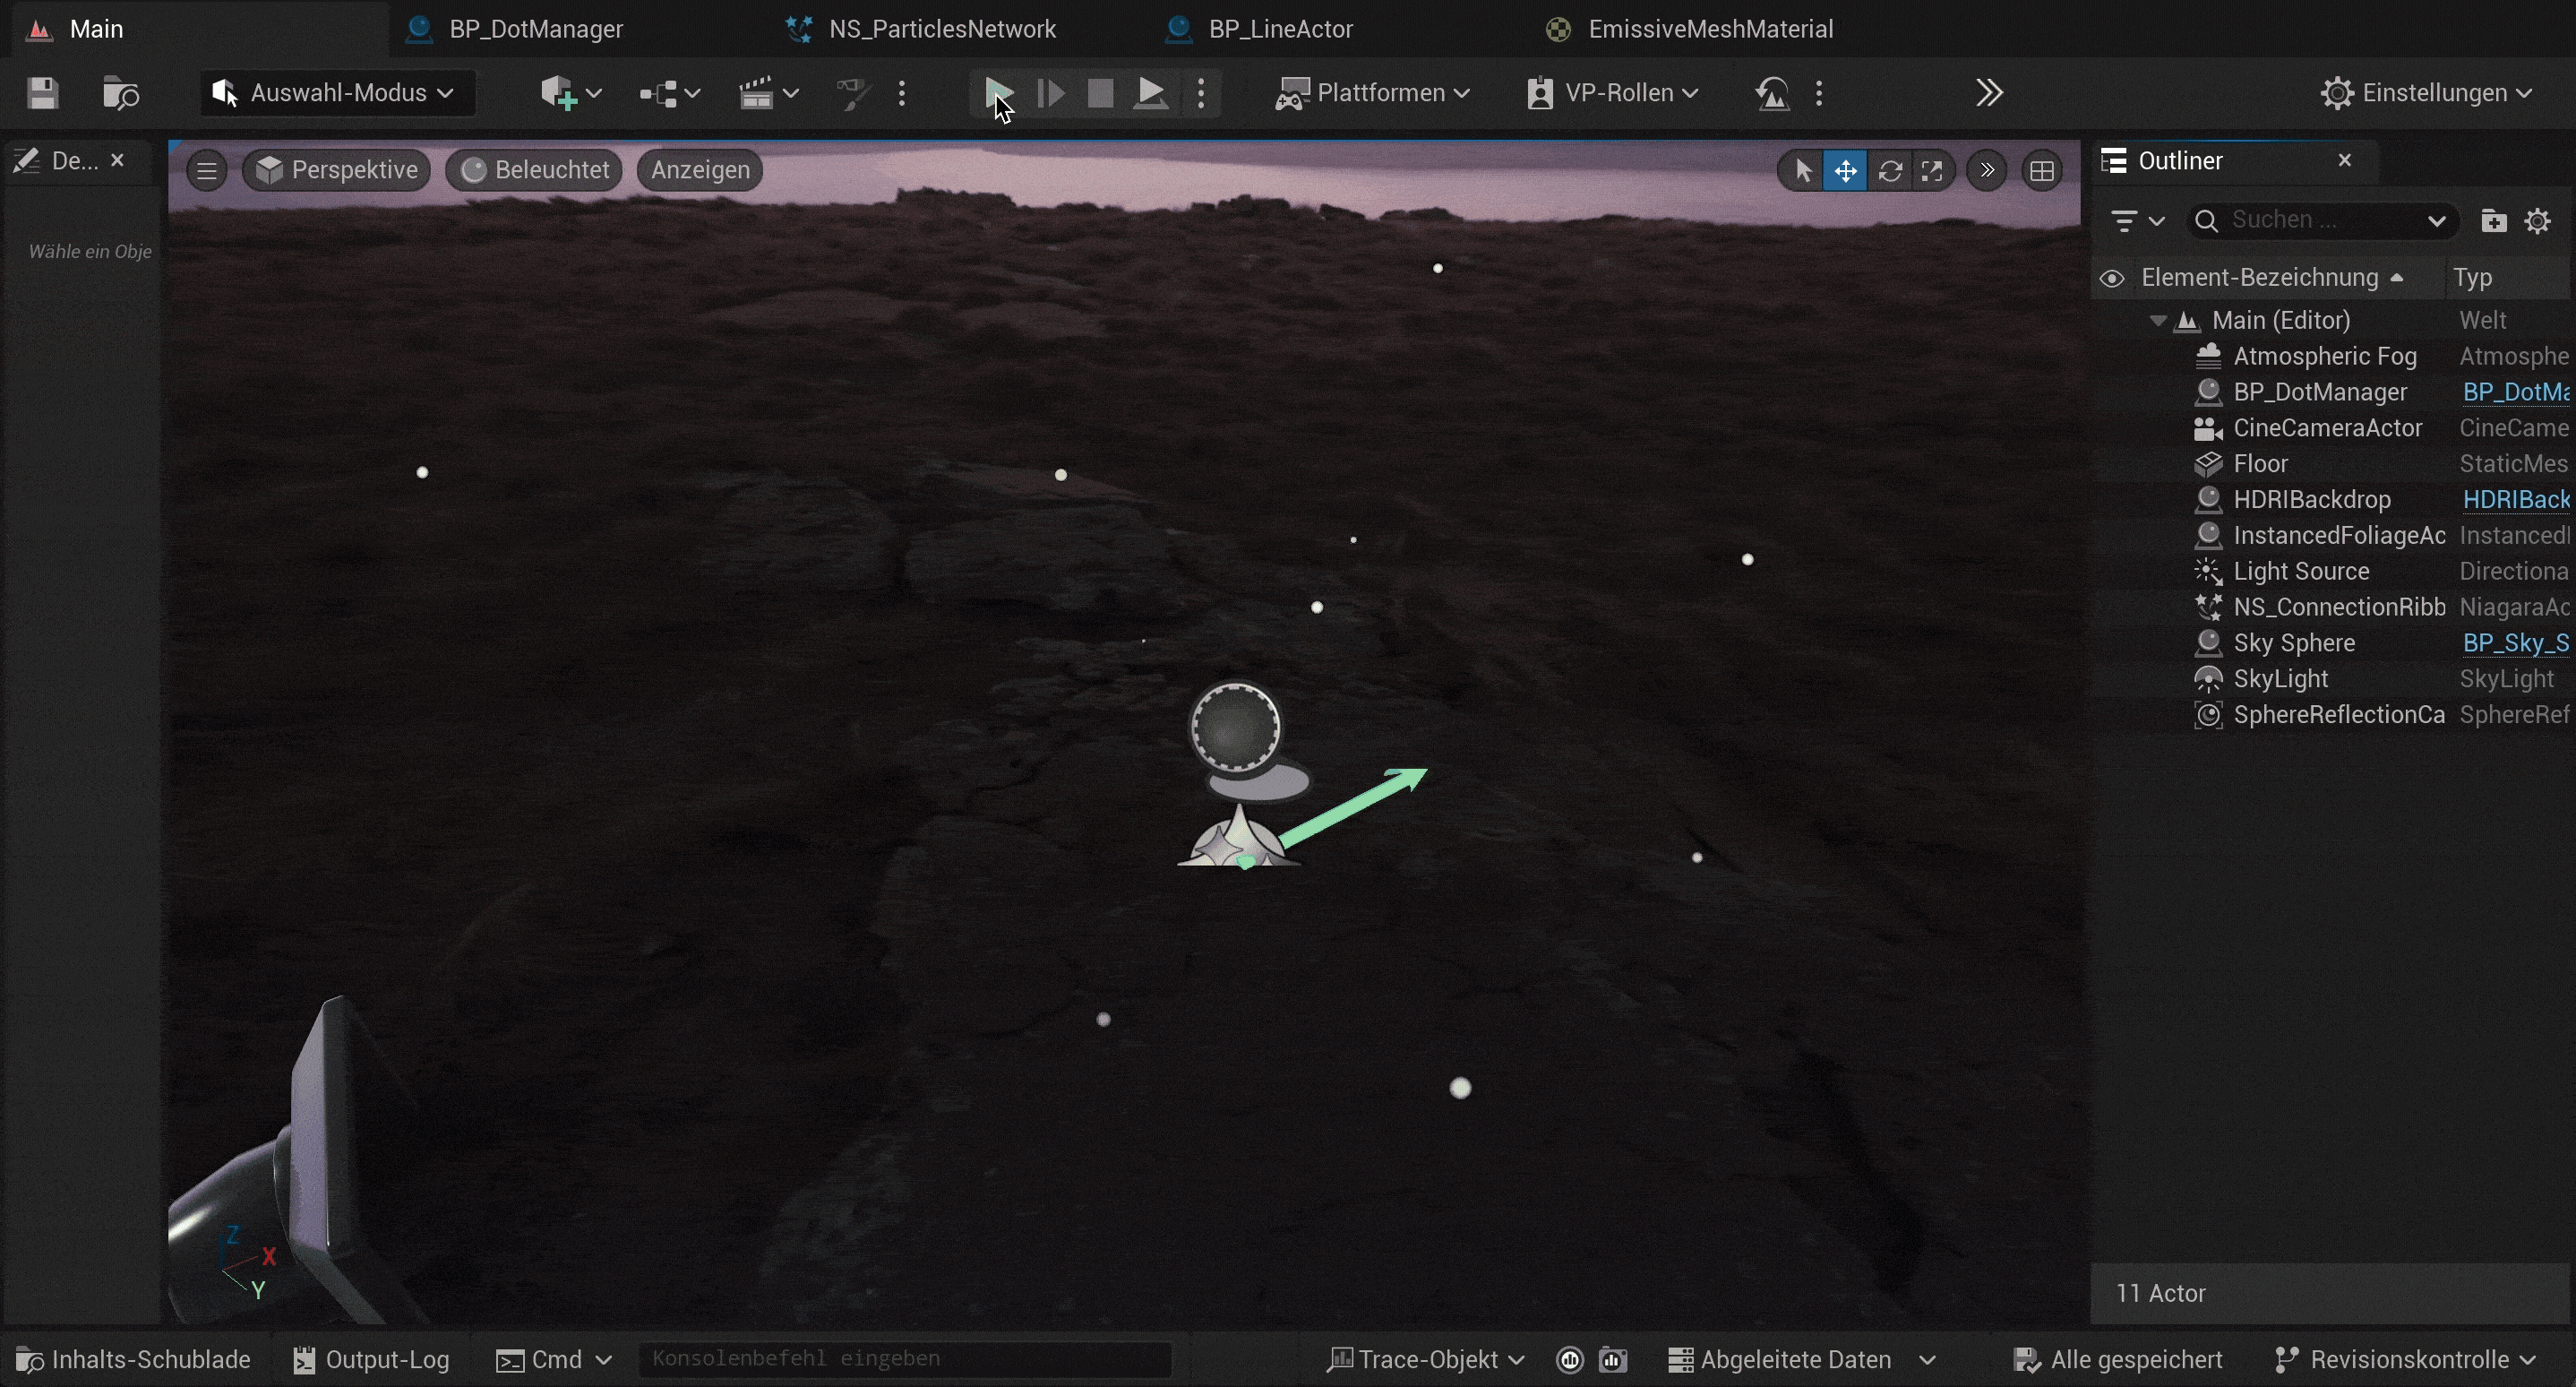
Thanks for reading! 😊
Sophie